
You could wish to record the screen on your Mac in order to record gaming or video calls, produce a corporate presentation, or even just to make a screencast instructional. For whatever reason, we’ll walk you through the process of screen recording on a Mac.
Screen Recording on a Mac Using the Screenshot Utility
Although you might be tempted to install third-party screen recorders on your Mac, utilising the included Screenshot programme is the most straightforward method of recording your Mac’s screen. With the help of this utility, you may take screenshots and screen captures using easy keyboard shortcuts.

On your keyboard, press Command + Shift + 5 to launch the Screenshot application. You have two screen recording choices at the bottom of the window that appears: Record Selected Portion and Record Entire Screen.
Your mouse pointer will change to a camera symbol if you select Record Entire Screen. If you utilise more than one monitor, this is useful. To start recording, simply move the camera to the screen you wish to capture and click.
Drag the box’s corners to change the frame size if you select Record Selected Portion. Additionally, you have the option to reposition the box on your screen.
You may choose from a number of options for your Mac screen recording by clicking on Options. This covers selecting the microphone of your choice, where to save the recording, and whether or not to record mouse clicks. Press the Record button to begin the recording when you’re ready.
After you’ve finished filming your Mac’s screen, you might not know how to end it since the Screenshot tool window will disappear. Instead, the macOS menu bar will display a tiny Stop icon. To end your Mac’s screen recording, click on it.
Alternatively, you may immediately end screen recording on your Mac by pressing Command + Control + Esc. An alternative method is to use Command + Shift + 5 to reopen the Screenshot utility box and select the Stop recording option.
Is It Possible to Screen Record a FaceTime Call on a Mac?
One may question if it’s possible to record a FaceTime call on the screen. Although Apple does not include a built-in feature for recording video chats in the FaceTime app, you may still capture video calls using the Screenshot application.
Make sure the other participant(s) on FaceTime are aware that you are recording the video chat, since they won’t be informed otherwise.
How to Use QuickTime Player to Record a Screen on a Mac
You may also use QuickTime Player to record the screen on your Mac. The QuickTime Player programme allows you to operate everything directly, while also utilising the Screenshot tool that we previously discussed. For older Macs running macOS High Sierra or previous versions, this might be helpful.
Open QuickTime Player, then choose File > New Screen Recording from the menu bar to start recording.
This opens an overlay where you can choose how you want to record your screen. Like with the Screenshot application, you may select to Record Selected Portion or Record Entire Screen.
Click the Record button to begin recording when everything is configured. When you’re finished, close the screen recording session by clicking the Stop symbol in the macOS menu bar.
The video recording will start playing right away. You might decide to use the Trim and Rotate tools to alter it as needed. When you’re finished, just select File > Save from the menu bar or use the keyboard shortcut Command + S to save the movie to the place of your choice.
How to Use OBS to Screen Record on a Mac?
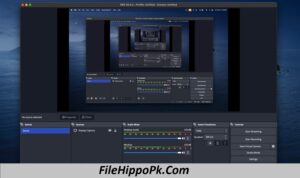
Unless you need extra functionality, there’s not much of a need to look for a third-party programme to record the screen of your Mac when you have the first two alternatives available. Our preferred third-party software for quickly recording the screen and audio of your Mac is OBS Studio, nevertheless, if you’re not happy with the built-in choices.
Both casual and ardent users agree that OBS Studio is the best free screen recording tool available. With the capabilities available in the app, you may personalise every element of your screen capture. Additionally, OBS Studio allows you to stream straight to a variety of networks, such as Facebook, Twitch, YouTube, and more.